Starting plants from Seed – No Experience Required!
May 16, 2022
Starting plants from seed can save you a lot of money, but it also helps you to understand how plants grow – which is really the best part!
1. Read the seed package for instructions.
- Some seeds should be started inside and only put out after the last frost, tomatoes and peppers are a good example of those. You can ask other gardeners in your neighborhood to see when the last frost usually happens (it will often be in early June).
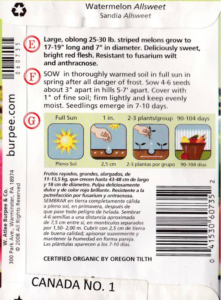
- Some seeds do well in the cold and can be directly planted outside. Onions and kale are good examples.
- Some seeds like wild flowers often need to go in the fridge or freezer for a few months before getting planted. Being cold and then warming up mimics the conditions in nature.
PRO-TIP – Don’t start seedlings inside too early. They will need to be transplanted many times and you may run out of room!
2. Get a nice potting soil mix. 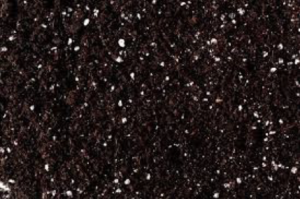
Seeds don’t grow as well in soil from outside, which can sometimes be rocky or have clay in it. Use a mix that is called “potting soil.” It usually looks like the photo below. The white bits are called perlite which keeps the soil moist longer.
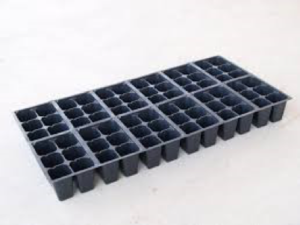
3. Prep your seed trays
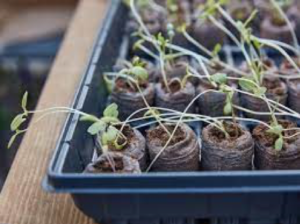
- Seed trays are sometimes called “cell packs” where there are lots of little pots connected together inside of a tray.
- You can use anything to start seeds in though, containers meant for the recycling bin can work really well too.
- If you don’t want to use any plastic at all, you can get a “soil block maker” tool and use them on wooden trays. This can make transplanting easier too.
PRO-TIP: You can get your soil quite wet in a bucket first and then put it in the cell packs up to the top. Your potting soil should be wet enough that you can get it to clump together if you put it in your hand and make a first. If your soil isn’t wet enough in the beginning, it will be hard to keep it moist enough for the seeds to germinate.
4. Planting
- Some seeds are really small. You can use a chopstick or the end of a pen to make a little hole. Put only about 1-3 seeds in each cell pack or two-inch square. If all three seeds germinate you can eventually pinch two off.
- You want to thin seeds a bit so that they don’t compete with each other for light and water. After all, a dozen healthy plants are better than thirty weak or unhealthy plants.
- Be patient! The package often gives you a germination time. If it is way past the germination date, you can try again with some more seeds.
5. Care and watering
- Plants grow in a spiral direction and move towards the light. Every day you should spin the tray around so that the opposite side is facing the window. If you leave the tray in the same position, the plants will grow sideways to reach the light and their stems will get very weak.
- Using overhead grow lights can help with this problem, but you can just try a window in the beginning if you don’t have any.
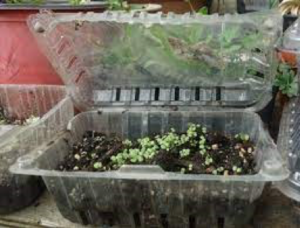
- Plants that are “leggy” meaning they get pale coloured stems and grow really tall, are often telling you they need more light. See photo below.
- Water your seedlings every day, but use a spray bottle to mist them. Too much water can make them get moldy. This part takes a bit of practice.
- Once plants are ready to be transplanted into larger pots you can switch to watering them with a small watering can (like the size used for house plants (1-2L not the 8-12L cans that are used for outside)
6. When to transplant?
-
- Usually when your seedlings are getting dry really quickly, they are old enough to move to bigger pots.
- Seedlings should be at least two-inches before they are transplanted. Doing it too soon will damage the tiny little root hairs. You should have also noticed the stems getting thicker and stronger.
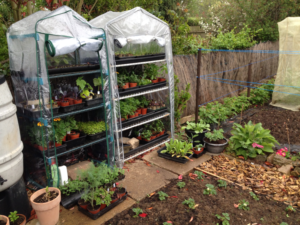
- Before you put your plants outside, you will need to “harden them off.” This means that you set them outside in a sheltered area for a short time (maybe even 15-30 minutes a day to start and gradually increase with time).
- This gets the tender seedlings used to the sun, wind and change in temperature. You can put them under a patio table for instance to keep the full sun off. A cool wind could kill them though, so try to make sure temps are closer to 20’C. If you are going to leave for the day for work or school, it isn’t a good idea to leave them out (at least early on) since the weather can change fast.
If you’re interested in learning more about The Gaia Project, click here to get in touch.
Follow us on social for more stories, news and updates:
Facebook: www.facebook.com/gaiaproject
Instagram: @thegaiaproject_
Twitter: @gaiaproject
LinkedIn: @TheGaiaProject